How to Get Clothing Samples From Clothing Manufacturers
There are well over 50,000 clothing suppliers listed online. That number keeps growing every year as more middlemen and trading companies set up storefronts.
How do you know which manufacturer can actually make a good sample—without wasting your budget?
From our factory floor in Humen, Dongguan, our team has produced hundreds of custom apparel samples and helped overseas brands fix failed prototypes from other suppliers. So maybe we just saved you months of costly trial and error 😉
Below, we walk through the exact 8-step sampling process, real cost ranges, and an inspection checklist you can copy.
By the way: If you are still estimating your production budget before ordering samples, we also put together a breakdown of custom hoodie manufacturing costs in China.
Why Are Clothing Samples So Important?
A clothing sample acts as the physical prototype before entering mass production. Skipping this phase or failing to inspect samples thoroughly remains a primary cause of inventory failure.
Samples allow you to verify fabric weight, hand feel, pattern grading, color accuracy, and trim compatibility. They also test real-world wearability, including pocket placement, zipper durability, and stretch recovery.
Locking down an approved sample protects your investment. Mass production runs follow the signed reference sample, reducing costly factory misunderstandings and return risks.
Types of Apparel Samples You Need to Know
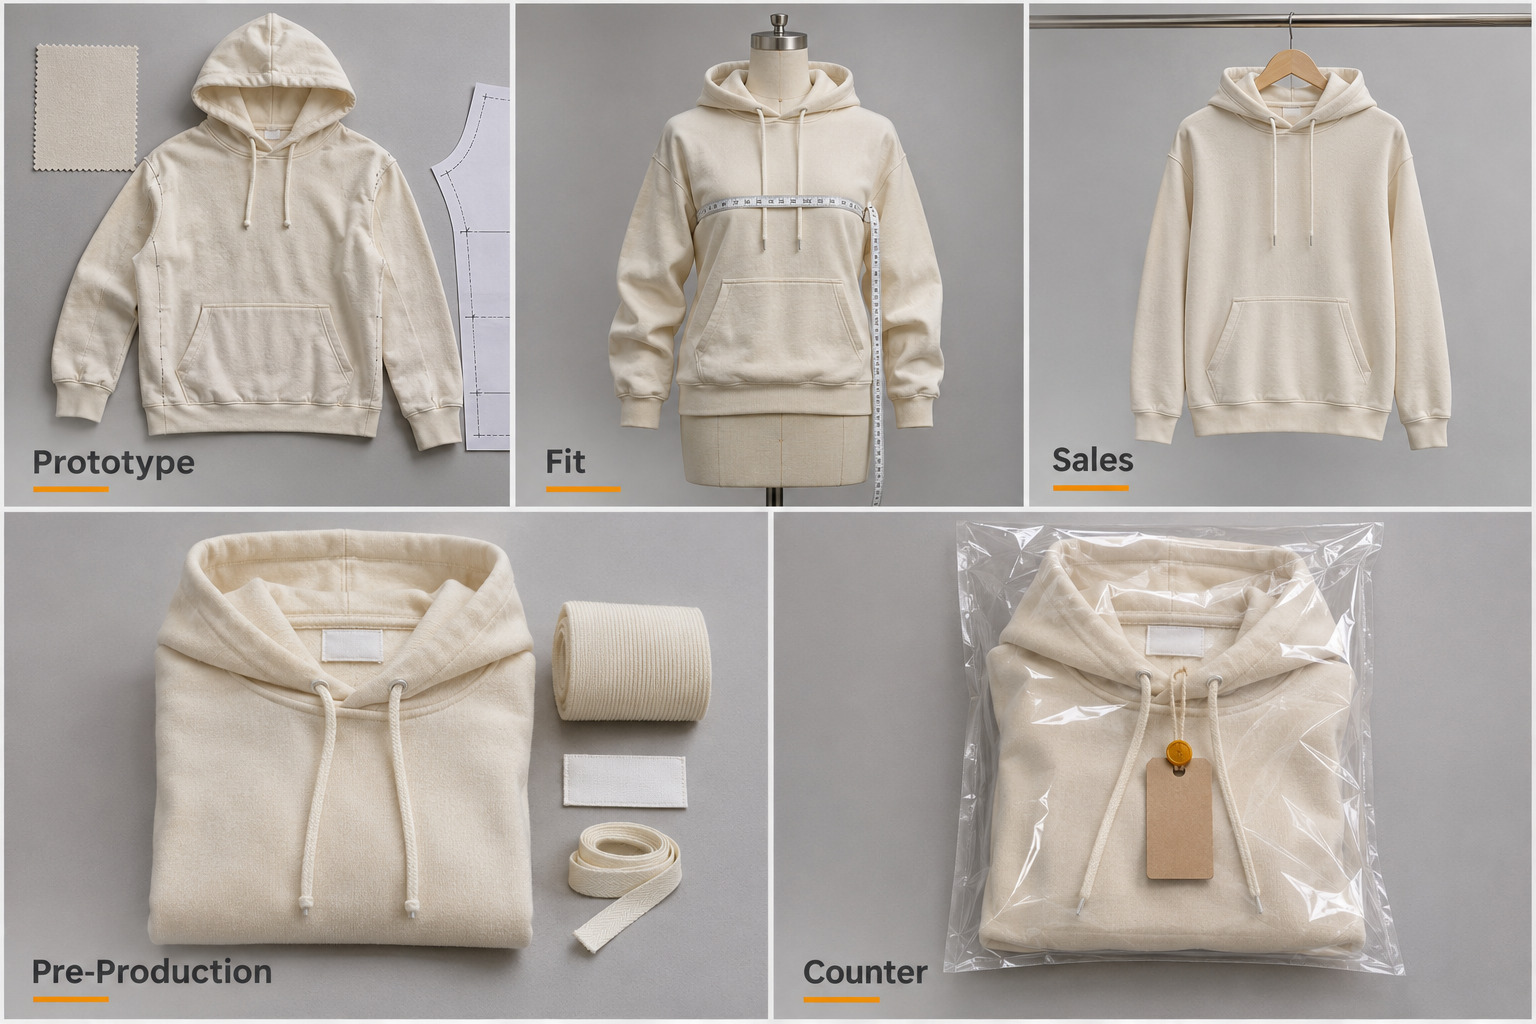
1. Prototype Sample (Initial Version)
The prototype sample serves as your first physical draft. It tests the basic garment silhouette and construction lines using available stock fabrics rather than final bulk materials. Emerging brands should start with a single prototype in one standard size to validate proportions before multi-color runs.
2. Fit Sample
The fit sample uses correct fabric specifications and precise grading measurements. It focuses entirely on how the garment hangs, moves, and fits the target body type. Fit samples undergo the most revisions before moving forward.
3. Sales Sample / Photo Sample
Sales and photo samples are produced in final commercial fabrics. They are deployed for digital marketing, brand catalogs, wholesale buyer presentations, and e-commerce model shoots.
Pre-Production Sample (PPS)
The pre-production sample is the final checkpoint before full-scale manufacturing. It incorporates actual bulk fabrics, custom labels, hardware trims, and decoration methods. Every detail matches the intended retail product.
5. Counter Sample
The counter sample is retained directly at the manufacturing facility. Production supervisors use this sealed reference item to verify sewing consistency and shade matching across every batch line.
How to Get Clothing Samples From a Manufacturer: 8-Step Process
Stage | Core Deliverable | Primary Objective | Typical Timeline |
1 Tech Pack | Technical specification sheet | Eliminate factory guesswork on sizing and trims | 2–5 days (buyer side) |
2 Shortlist | 3–5 vetted suppliers | Match factory capabilities to your product category | 3–7 days |
3 Inquiry & Terms | Written sample quote | Lock sample fee, refund rules, and free revision limits | 1–3 days |
4 Swatches | Approved fabric & trim cards | Confirm GSM weight, hand feel, and Pantone shade | 5–10 days (incl. shipping) |
5 Sample Order | Payment & pattern setup | Initiate pattern drafting and first prototype sewing | 7–14 days (3–7 days at SuhuCustom) |
6 Inspection | Measurement & fit audit | Identify sizing deviations, stitch defects, or logo flaws | 2–4 days |
7 Revisions | Annotated feedback sheet | Correct pattern geometry and finalize construction | 7–14 days per round |
8 Counter Sample | Signed Gold Seal sample | Establish the binding quality standard for mass runs | 3–7 days |
1 Prepare a Detailed Clothing Tech Pack
A tech pack is the complete blueprint a clothing manufacturer uses to build your garment without guessing. Sending only inspiration photos forces pattern makers to estimate measurements, seam types, and fabric weights, which almost always produces an inaccurate first sample.
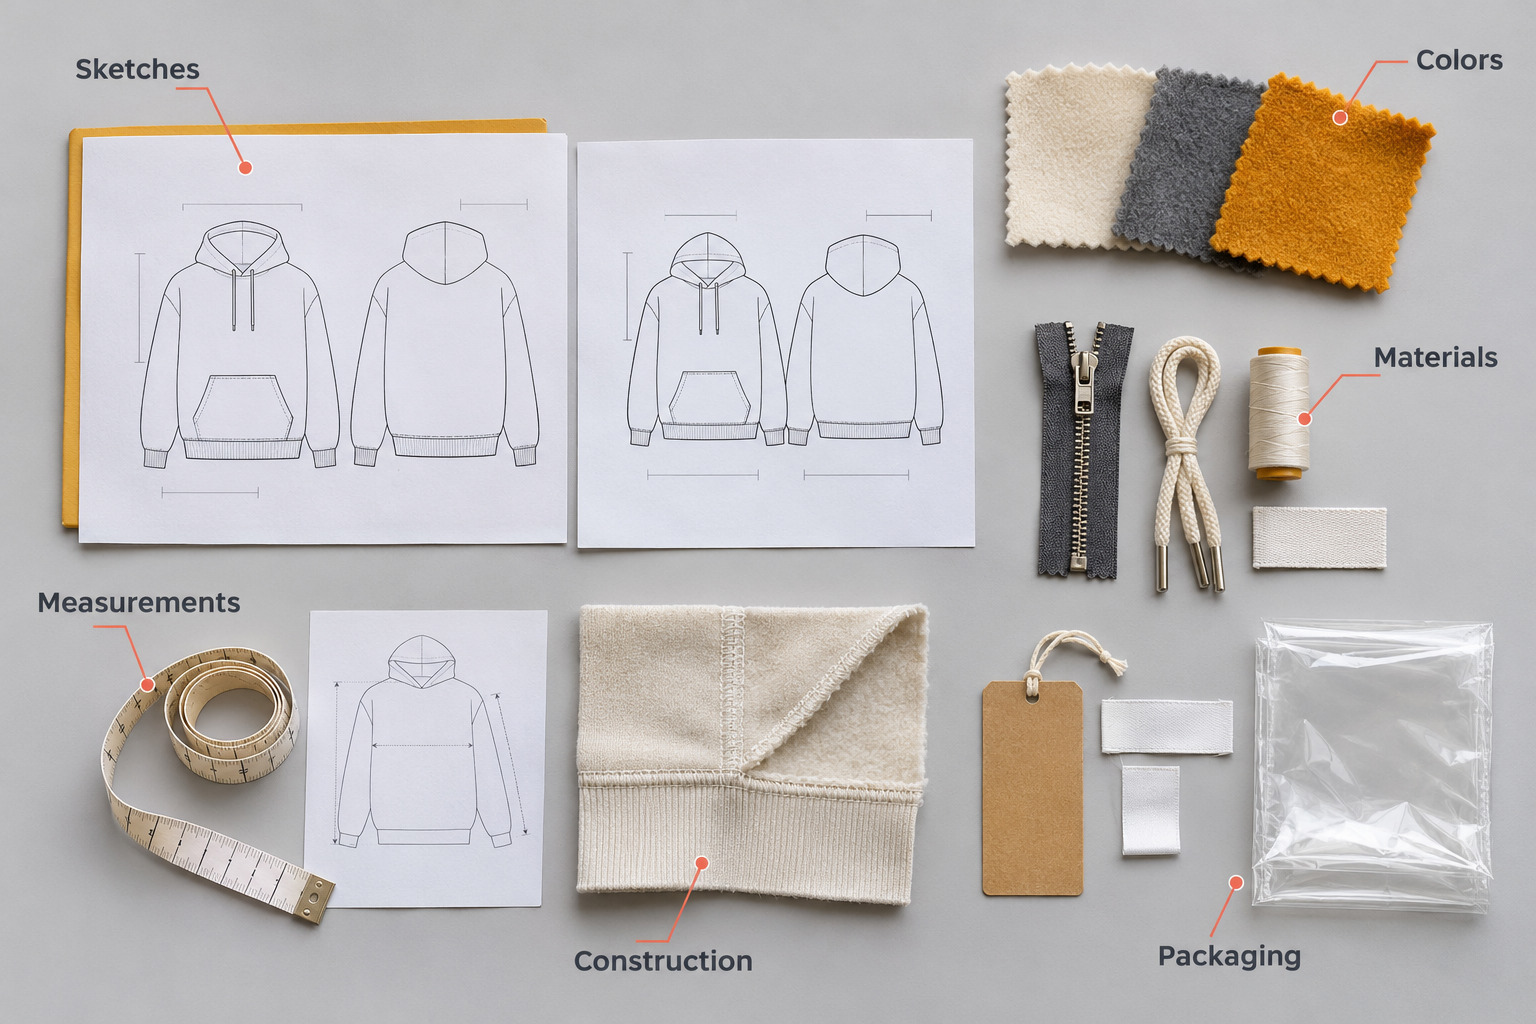
Your tech pack should include six core components:
Technical Flat Sketches: Black-and-white front, back, and close-up vector drawings showing seam lines, pocket placements, and stitch details.
Bill of Materials (BOM): A complete list of every fabric, thread, zipper, button, drawstring, and woven label required, with supplier codes or specs.
Graded Measurement Chart: Exact dimensions for every Point of Measure (POM)—such as chest width, sleeve length, and shoulder drop—along with acceptable tolerance limits (typically ±0.5 inches for knits and ±0.25 inches for wovens).
Colorways & Artwork: Pantone TCX codes for fabric dyeing and high-resolution vector files (AI or PDF) for screen printing or embroidery.
Construction Notes: Stitch types (e.g., coverstitch, flatlock, single-needle), seam allowances, and interlining specifications.
Labeling & Packaging Specs: Exact placement for neck labels, care tags, hang tags, and polybag folding dimensions.
Factory Tip: If you are launching a simple staple like a blank hoodie or heavyweight T-shirt and do not have a formal tech pack, send a physical reference garment that fits the way you want. At SuhuCustom, our pattern team can reverse-engineer measurements from a physical reference sample or help translate clear design sketches into production-ready patterns.
2 Find and Shortlist Reliable Clothing Manufacturers
Shortlist 3 to 5 clothing manufacturers that specialize in your specific garment category rather than contacting dozens of general trading companies. A factory built for structured woven outerwear rarely delivers competitive pricing or specialized machinery for seamless activewear or heavyweight fleece hoodies.
Evaluate potential suppliers against four practical filters:
Product Specialization: Review their past production photos for garments matching your fabric weight and stitch complexity.
Factory vs. Trading Company: Ask for a live video walkthrough of their cutting room and sewing lines. Direct factories—such as SuhuCustom in Humen, Dongguan—eliminate middleman markups and prevent technical details from getting lost in translation.
MOQ Alignment: Confirm whether their bulk Minimum Order Quantity matches your launch budget. Many traditional export factories require 500 to 1,000 pieces per style, whereas flexible manufacturers accommodate small-batch trial orders.
Communication Speed: Track how thoroughly they answer technical questions in their first two replies. Slow or vague answers during sampling usually worsen during bulk production.
3 Send Inquiry & Confirm Sampling Terms Upfront
Never pay for a sample until you receive a written breakdown of all commercial and revision terms. Your initial Request for Quotation (RFQ) should state your target order quantity, fabric preference, logo method, and shipping destination so the factory can quote accurately.
Before transferring any sample fee, get written answers to these five questions:
All-In Sample Cost: Does the quoted price (50–250+ depending on complexity) include custom trims, print screens, embroidery digitizing, and international courier shipping?
Sample Fee Refund Policy: Will the factory credit the sample cost back toward your bulk invoice once you place a full production order?
Included Revisions: How many rounds of minor pattern or fit adjustments are included in the initial fee, and what triggers a new sample charge?
Fabric Availability: Will the prototype use your exact bulk fabric or a temporary stock substitute?
Sample Lead Time: How many working days are required from payment receipt to courier dispatch?
4 Confirm Fabric, Trims & Color Swatches First
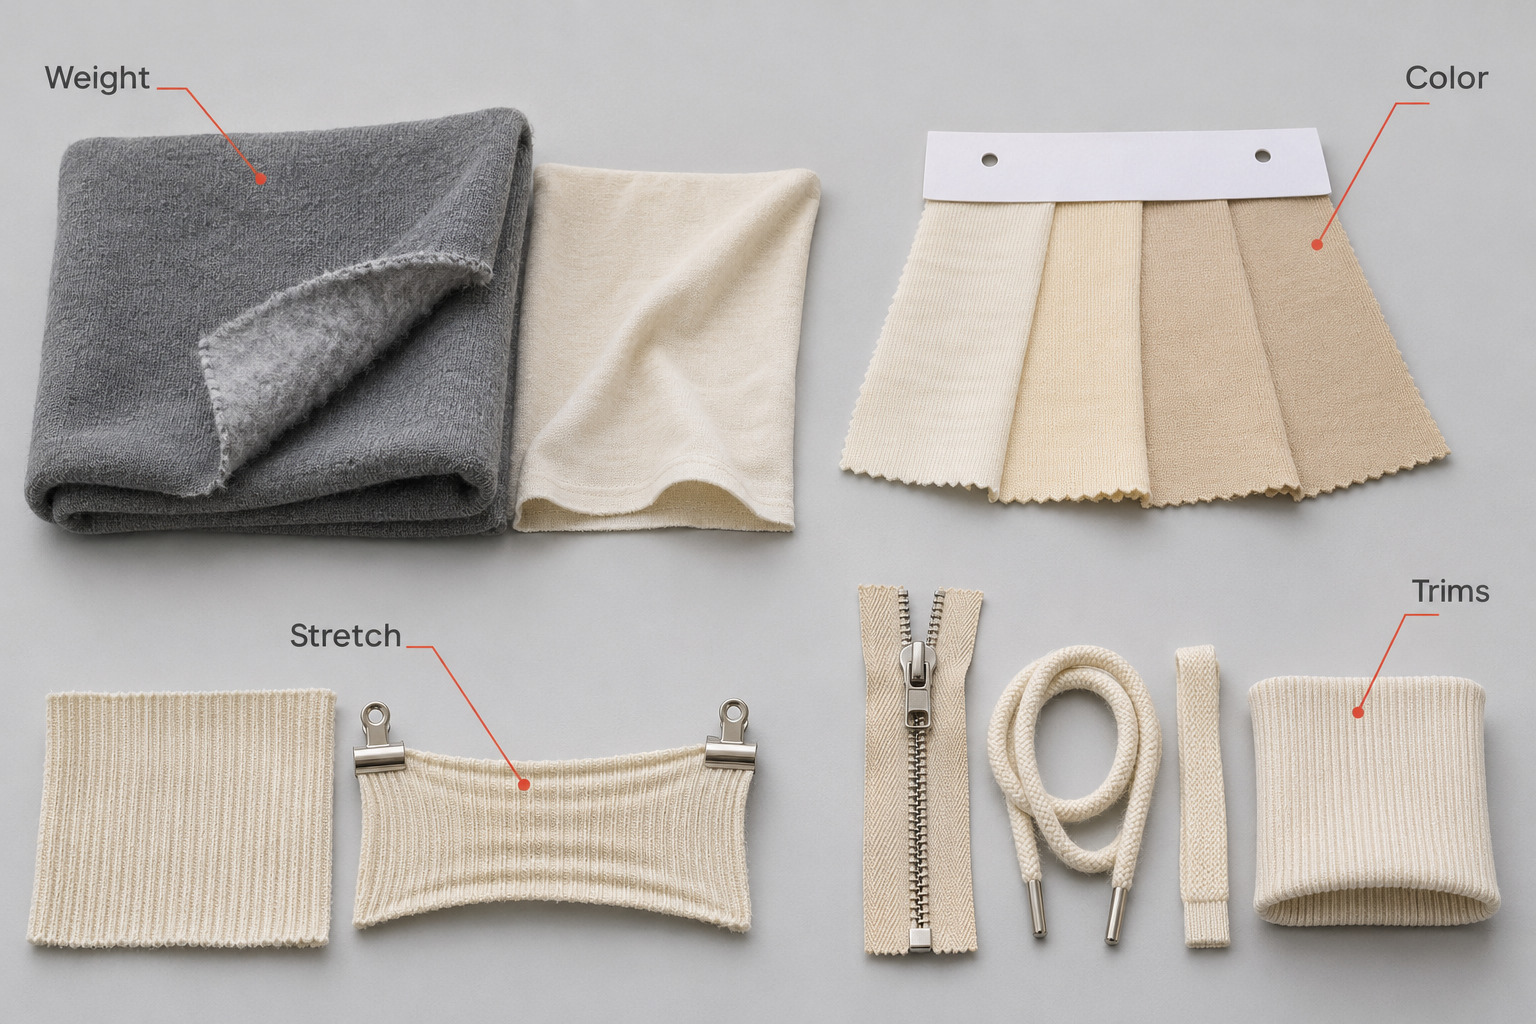
Request physical fabric swatches, lab dips, and trim cards before the factory cuts a single piece of pattern paper. Screen colors and digital descriptions cannot convey fabric drape, stretch recovery, pilling resistance, or surface hand feel.
Reviewing swatches first prevents the most expensive sampling mistake: sewing a complete garment only to realize the fabric is too thin, too stiff, or the wrong shade.
Check Fabric Weight (GSM): Verify that the physical swatch matches your target grams per square meter (e.g., 400–500 GSM for structured hoodies, 180–240 GSM for T-shirts).
Test Stretch and Recovery: Pull knit swatches both vertically and horizontally to confirm they snap back without distortion.
Approve Lab Dips Under Natural Light: If custom-dyeing fabric to a Pantone code, inspect the dyed swatch in daylight—not under office fluorescents—to confirm shade accuracy.
Verify Hardware & Trims: Check zipper smoothness, drawstring thickness, and ribbed cuff elasticity against your BOM.
5 Place Sample Order & Pay Sampling Fee
Once your tech pack and swatches are approved, pay the sample invoice to lock your slot in the factory's sample room. Most overseas manufacturers accept wire transfers (T/T), PayPal, or Alibaba Trade Assurance for small sample payments.
During this stage, the factory executes four internal steps:
Pattern Drafting: A pattern maker translates your size chart into digital CAD patterns and plots full-scale paper templates.
Fabric Cutting: Technicians hand-cut panels carefully to align fabric grain lines and print placements.
Logo Application: Panels are sent to in-house or local embroidery, screen printing, or heat-transfer stations before assembly.
Sample Sewing: Master sample sewers assemble the complete garment from start to finish and record construction notes for future bulk lines.
While standard overseas sampling typically takes 7 to 14 business days, facilities located inside mature textile clusters can move faster. Because SuhuCustom operates directly in Humen, Dongguan—with immediate local access to over 100 fabric and trim suppliers—standard sample development usually finishes within 3 to 7 days, depending on design complexity and material availability.
6 Inspect Your Clothing Sample for Quality and Fit
When your sample arrives, conduct a structured physical audit rather than relying on a quick visual glance. Lay the garment flat on a hard table and measure every Point of Measure against your original tech pack.
Complete this 5-point inspection checklist before writing feedback:
Measurement Audit: Record actual garment dimensions alongside your tech pack specs to flag anything outside tolerance.
Live Fit Test: Have a fit model matching your target size wear the garment while standing, sitting, and raising their arms to check mobility and neckline gapping.
Stitch & Seam Check: Inspect seam tension, stitch density (SPI), bartack reinforcements at stress points, and loose thread ends.
Decoration Quality: Check embroidery backing, print crispness, color opacity, and alignment relative to seams.
Wash & Shrinkage Test: Wash and dry the sample using the care label instructions, then re-measure to verify shrinkage stays within acceptable limits (typically under 3–5% for pre-shrunk cotton).
7 Request Sample Revisions With Clear Feedback
Translate your inspection findings into an objective, visual revision sheet. Vague comments like "the sleeves look baggy" or "the collar feels tight" force pattern makers to guess and often create new fit problems.
Format every revision point using the Location + Current Measurement + Target Change formula:
Weak feedback: "Make the hoodie fit better around the waist."
Clear feedback: "At hem rib opening (POM #8), reduce relaxed width from 52 cm to 49 cm. Keep rib height at 7 cm."
Attach high-resolution photos of the sample laid flat next to a measuring tape, using digital arrows to point directly to problem areas. Most custom garments require 2 to 3 sample rounds (Proto Sample → Fit Sample → Pre-Production Sample) to achieve retail-ready accuracy.
8 Approve Counter Sample and Lock Specs for Bulk
Never authorize mass production until you have signed off on a Pre-Production Sample (PPS) made with 100% actual bulk fabrics, trims, labels, and packaging. Once you approve this final sample, the factory produces two identical Counter Samples (Gold Seal Samples).
Buyer Copy: Shipped to you for final written sign-off and retained as your reference benchmark when bulk goods arrive.
Factory Copy: Tagged, sealed, and placed directly on the production floor so line supervisors and quality inspectors can compare bulk units against the exact approved standard.
Rule of Thumb: Put your final approval in writing via email, explicitly stating that bulk production must match the sealed Counter Sample in fabric weight, Pantone shade, measurement tolerances, and stitch construction. Any unapproved deviation during bulk runs then becomes the factory's responsibility to correct.
How to Reduce Clothing Sampling Costs and Avoid Waste
Uncontrolled sample iterations quickly drain startup budgets. Limiting your initial request to a single prototype prevents excessive multi-size expenses.
Avoid changing fundamental design structures or fabric choices midway through the sampling cycle. Major alterations force the factory to restart pattern grading, generating duplicate fees and extending lead times.
Clear communication during the initial tech pack stage prevents misunderstandings. Providing accurate vector artwork and reference garments reduces the need for expensive secondary revisions.
How to Inspect Clothing Samples and Provide Revision Feedback
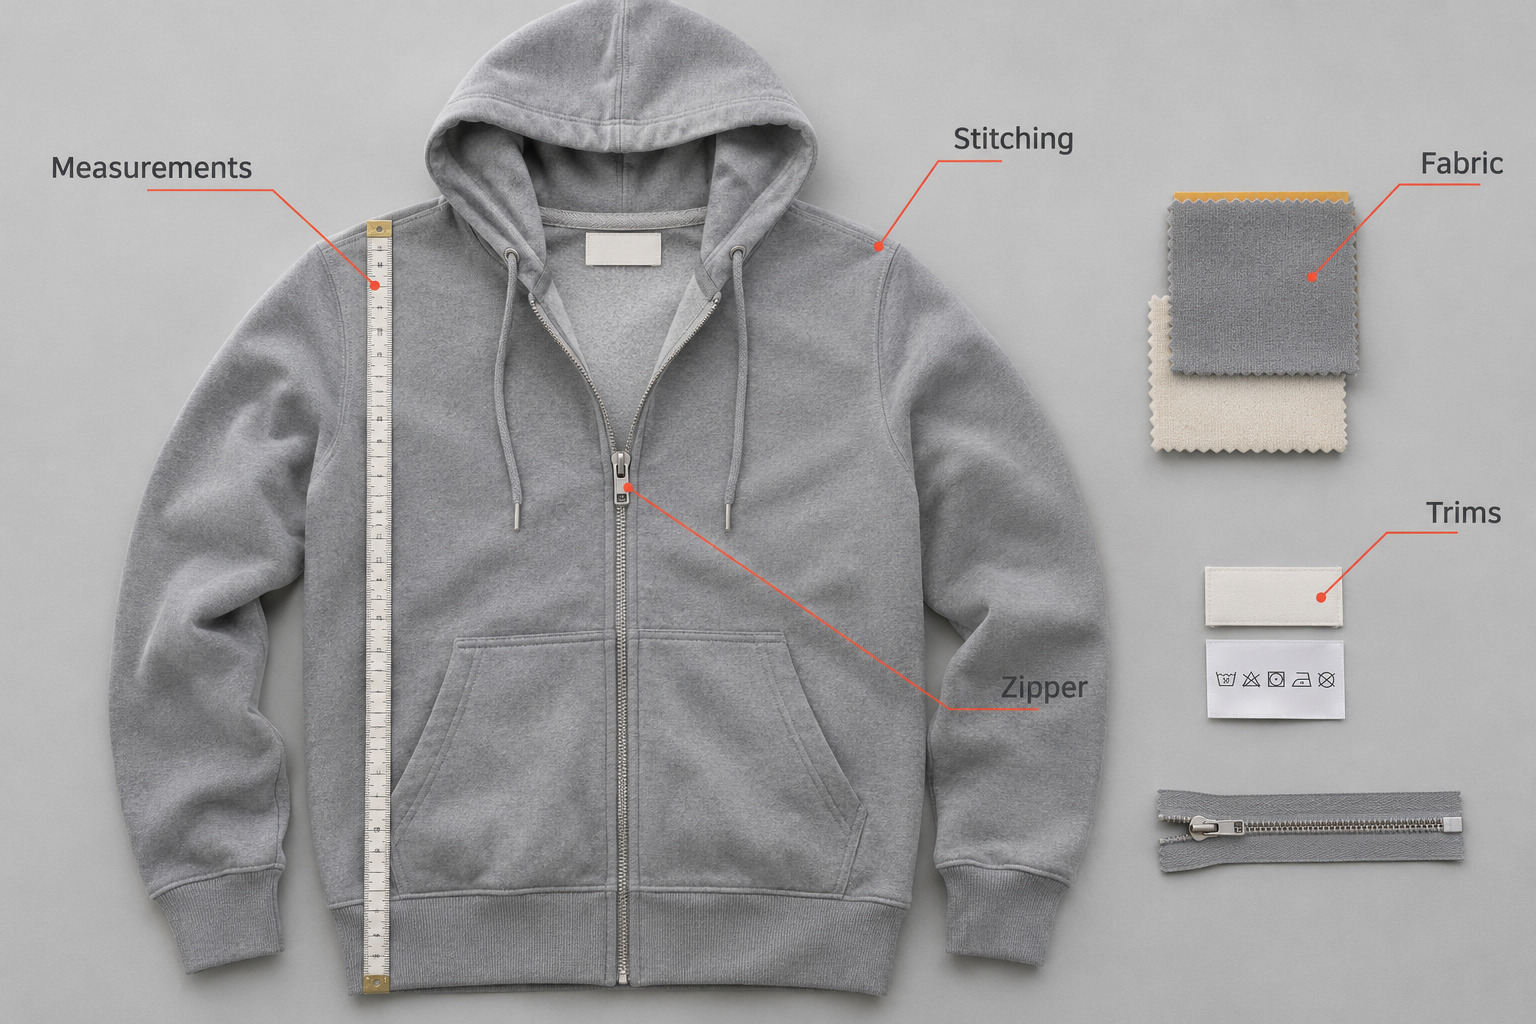
Inspecting a physical sample requires a systematic approach. Evaluate every construction detail before signing off on mass production.
Fit & Dimensions: Measure key points like chest width, sleeve length, and body hem against your tech pack specifications.
Fabric Properties: Check fabric weight, stretch recovery, hand feel, and color consistency under natural lighting.
Workmanship: Inspect stitch density, seam cleanliness, thread trimming, and button or zipper reinforcement.
Branding & Trims: Verify that woven labels, care instructions, hang tags, and logo placements match brand standards.
Functionality Testing: Check zipper smoothness, pocket depths, and stretch comfort during movement.
When requesting changes, avoid vague statements like "the fit feels wrong." Use structured feedback that identifies the exact measurement point, current condition, and required adjustment. For example: "Increase back body length from high point shoulder by 2.5 cm and change drawcord width from 8mm flat to 6mm round."
Best Tools and Resources for Clothing Sample Development
3D Virtual Sampling Software: Programs like CLO3D or Tukatech simulate fabric drape and fit digitally, reducing physical prototyping rounds and shipping delays.
Tech Pack Management Platforms: Tools like Techpacker help organize bills of materials, grading charts, and revision history in one shared digital workspace.
Fabric and Trim Sourcing Networks: Local textile markets and swatch suppliers offer direct access to trial yardage and specialty accessories.
How SuhuCustom Helps Brands Get Custom Clothing Samples
SuhuCustom operates directly from Humen, Dongguan, providing direct factory communication without intermediate trading markups. Our experienced production teams assist emerging brands, eCommerce merchants, and private-label clients through every development phase.
Sample development typically takes 3 to 7 days, depending on product complexity and material availability. We handle customized fabric sourcing, precision pattern adjustments, logo embroidery, screen printing, heat transfer, and private-label trims.
Every sample undergoes strict dimensional checks before dispatch. We offer flexible small-batch trial orders, video factory inspections, and secure design confidentiality agreements to protect your intellectual property.